Creating offices and spaces
Navigating offices
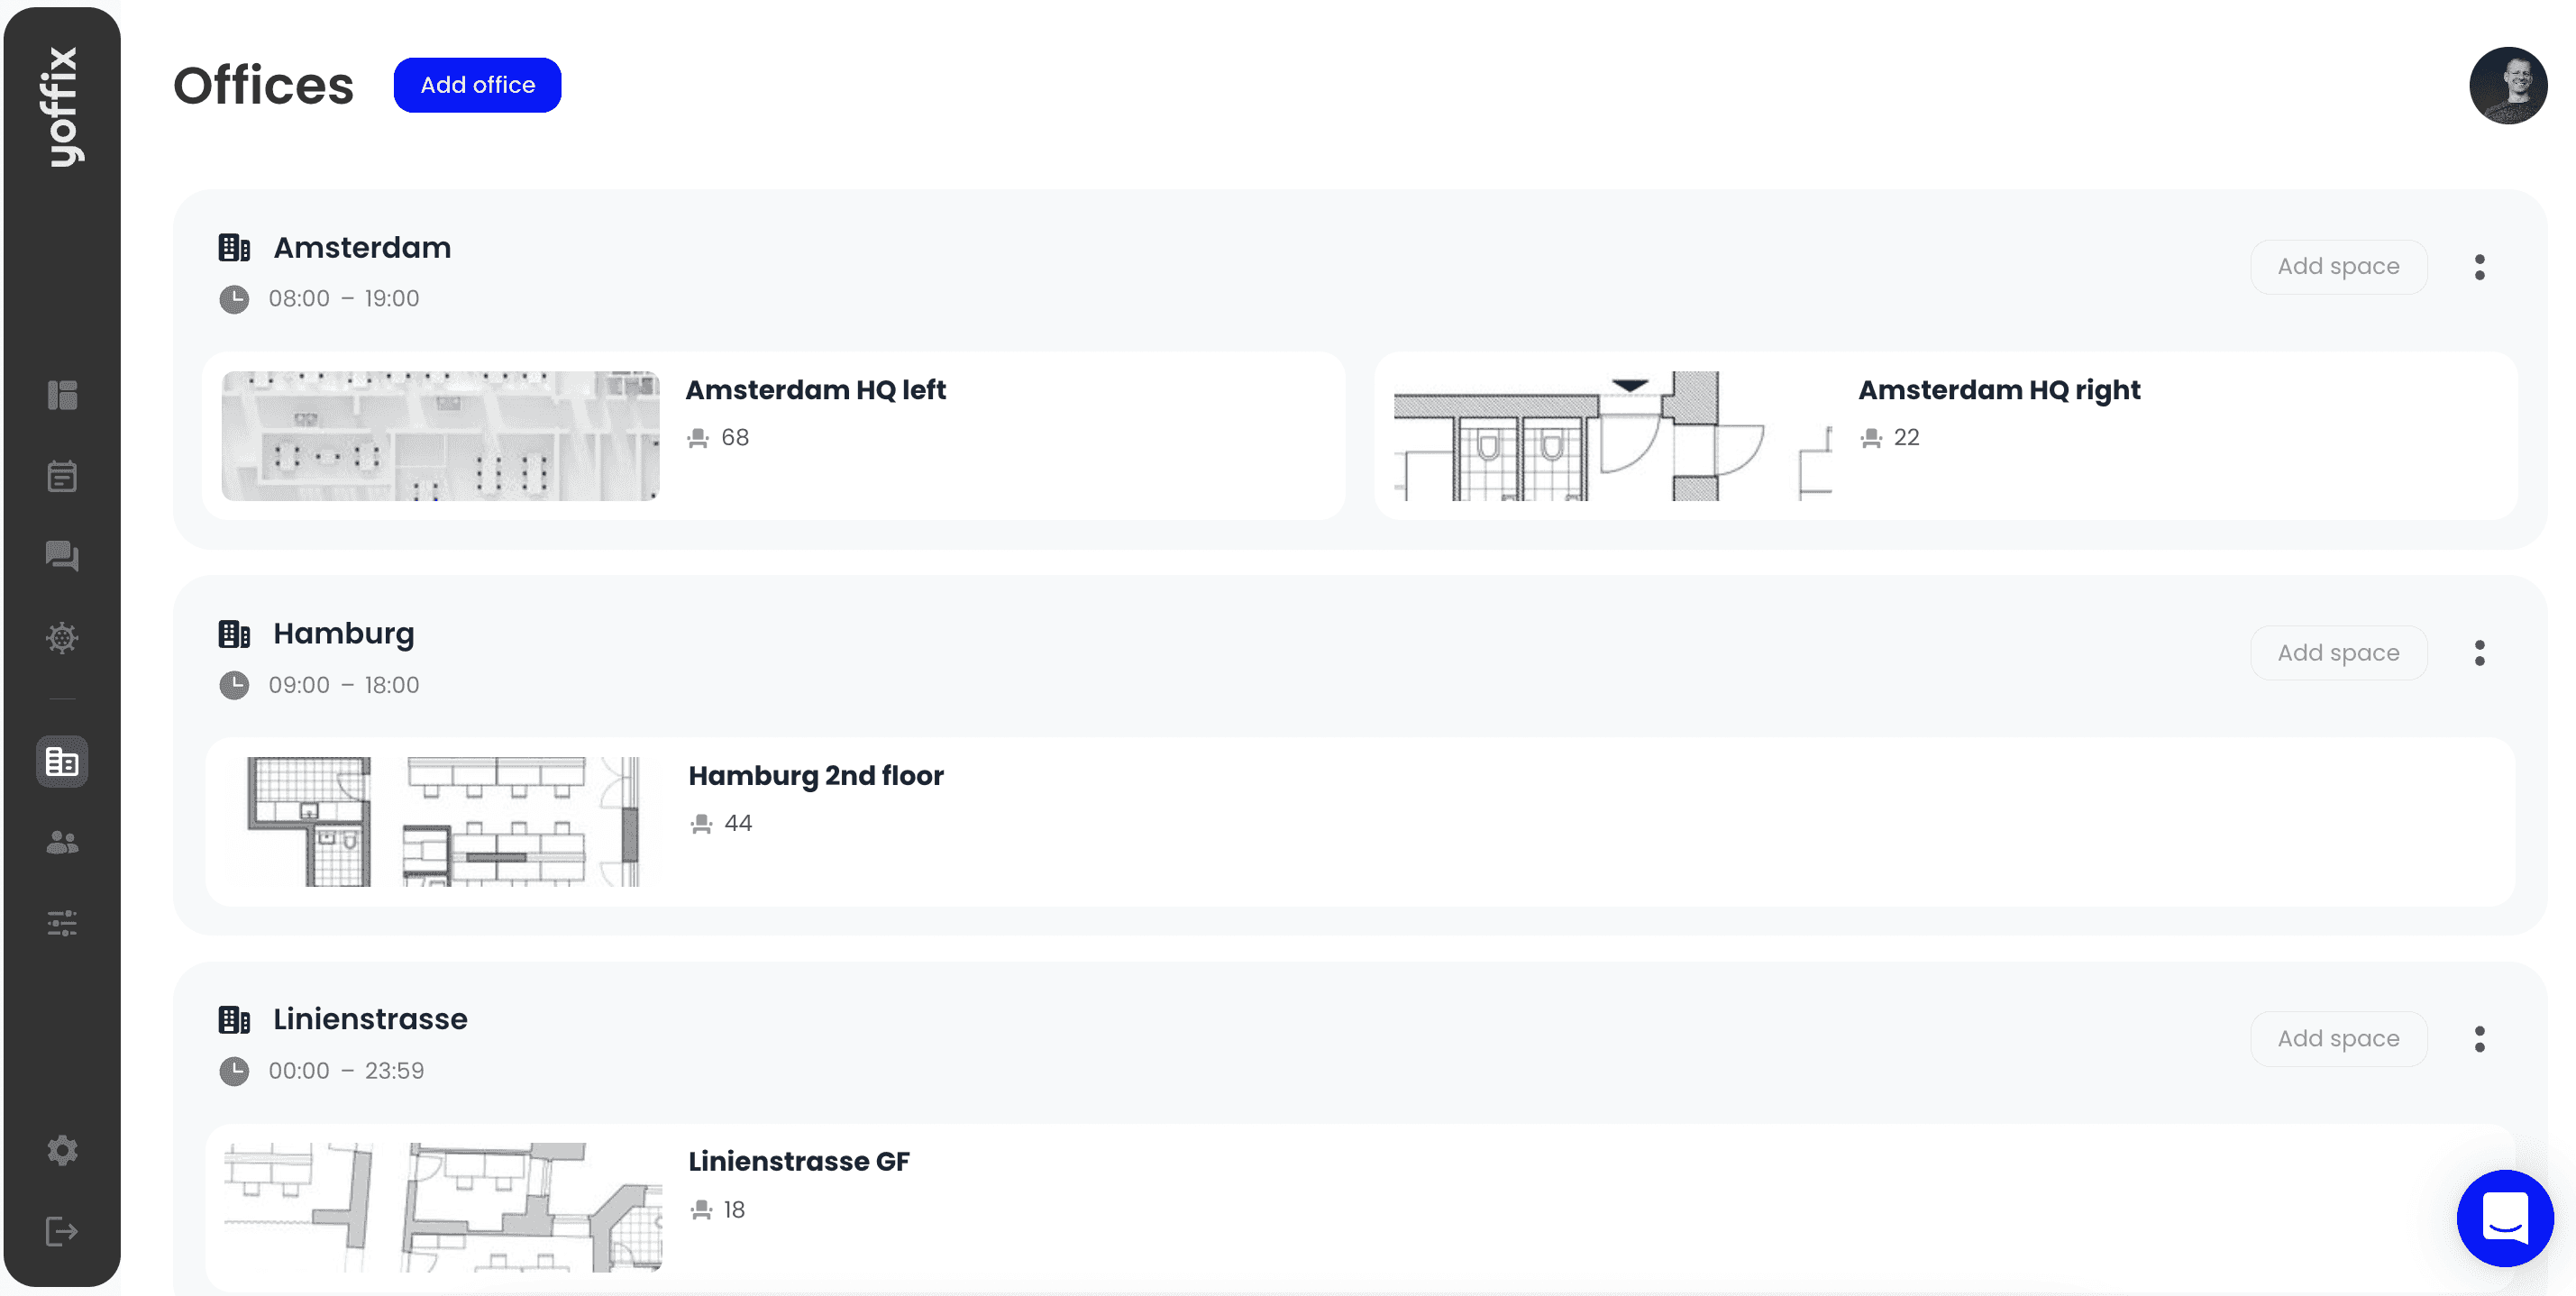
Select Offices on the sidebar to access the Yoffix OfficeBuilder
Our OfficeBuilder is very flexible - you can create an unlimited number of offices, and each office can consist of different spaces (e.g. floors or zones)
Click Add office to create a new office
You will be asked to enter information about your office (office name, address, time zone and working hours). Time zone and office hours should be filled out so that the usual working hours are reflected for meeting rooms and meetings are reflected correctly in different time zones
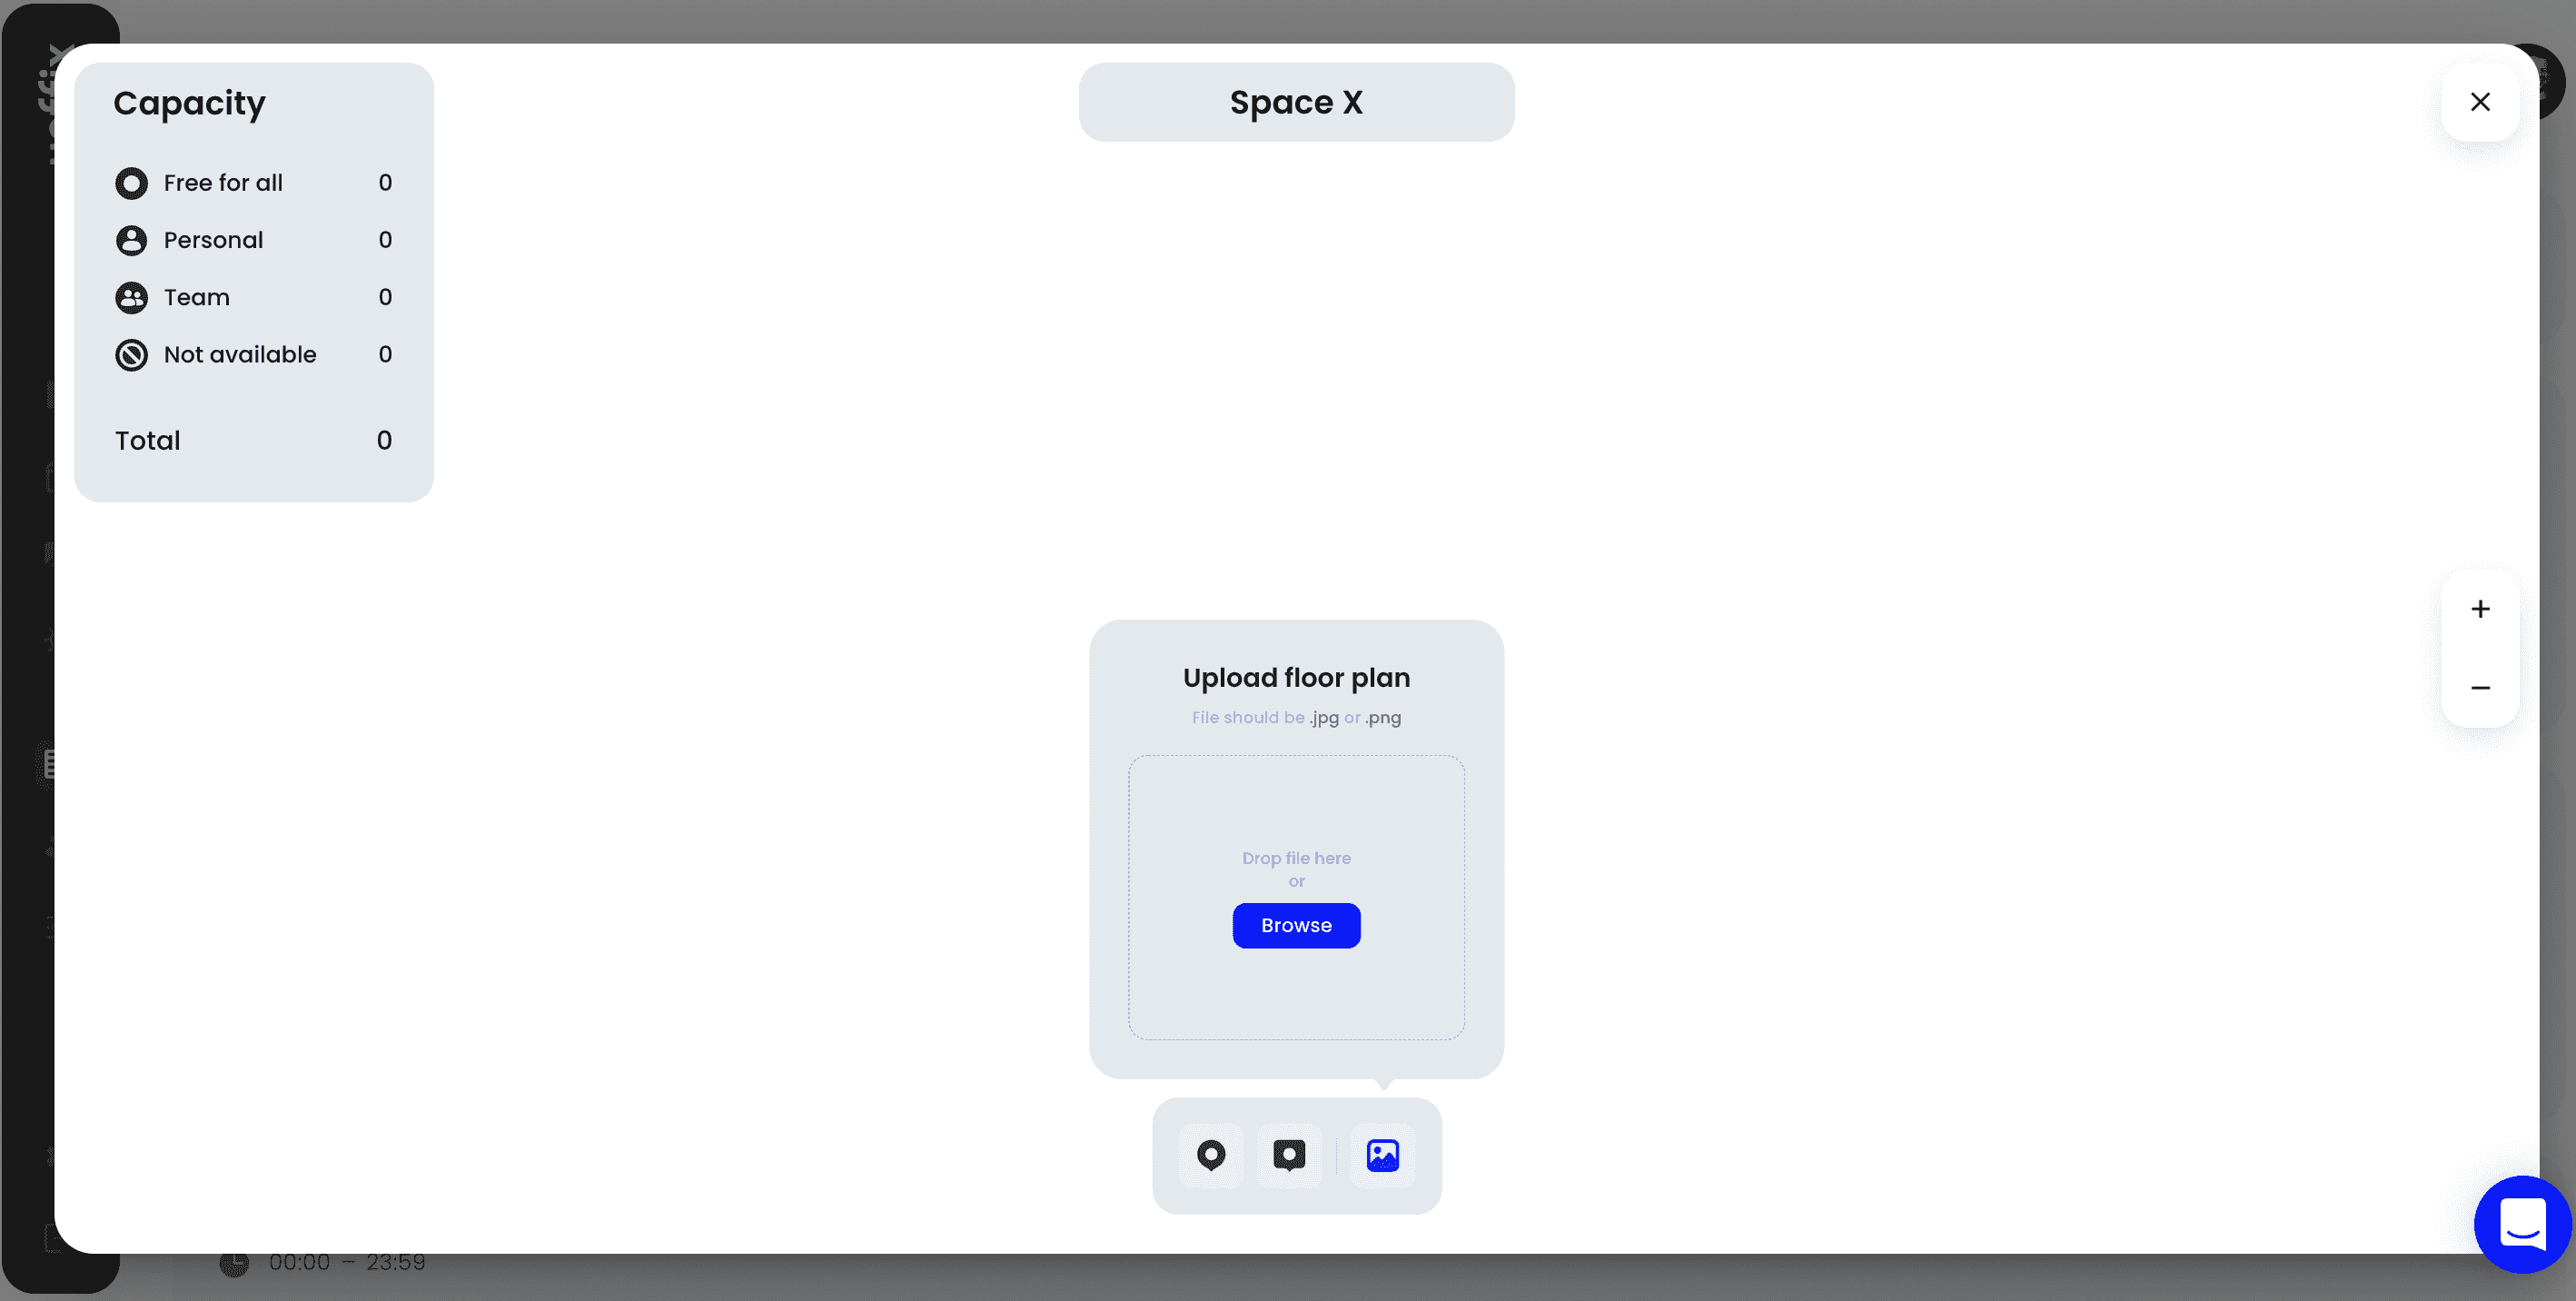
After that you can add a Space to your office - this is where your floor plan will be shown and desks/rooms will be created
Give a name to your new space (e.g. 2nd floor)
Upload your floor plan (see Step 2 below)
If you need to add another space to an existing office, click Add space on the right
If an office has already been created, click on two dots on the right to edit or delete this office
If you need to edit or delete an existing space, hover over it and select the edit or delete icon
Uploading a floor plan
Floor plans can be uploaded in Spaces as you set up a new space or if you edit one of the existing spaces.
In order to upload a floor plan, click on the Browse button or drag the file into the file drop zone
Create a name for your space that can be easily recognized by your employees (for example, “Munich, 1st floor”)
The Capacity section shows the information on the number of available desks in the current space after desks are created (see next section of the tutorial)
It is not a problem if you don’t have proper floor plans (clean, nice-looking, and without unnecessary information). Our designer would be happy to create these floor plans for you upon request.
Requirements for floor plans: when uploading a floor plan, the file must be in JPEG or PNG format